# Re-Doing the Django Tutorial With FastAPI And React: Setting up a FastAPI project !
FastAPI is an awesome modern Python framework designed to enable developers to quickly build robust and performant APIs.
Once you start getting the hang of it, you can become super efficient in building new endpoints and implementing
complex business logic. However, it might be destabilizing at first when coming from more opiniated Framework like [Django](https://www.djangoproject.com/) that
offers more functionnalities out of the box.
Thus, I thought it could be interesting (and fun !) to re-recreate the well known polls app from the Django tutorial, but this time using FastAPI
and React ! In this multi part series I'll try to follow the same path as the original as much as possible, although I'll probably split
some parts in two to avoid an overload of information.
Today is part 1 : Setting up the project, creating the polls app and making your first ~~django view~~ **path operation**
The code for this part is available [here](https://github.com/jbrocher/fastapi-poll-1) but I encourage you to code along instead !
---
## 🔧 Setting up the project
FastAPI is quite easy to setup, in fact all you need to run a FastAPI app is a singe file instantiating
the main app and an [ASGI](https://asgi.readthedocs.io/en/latest/) worker to run it. Of course we'll go a bit further. We'll run
the app in a Docker container so you'll need to have it installed on your machine
### The docker image
First we need to install a few dependencies and we'll use [poetry](https://python-poetry.org/docs/) to manage them. Poetry is a modern package manager for python, that also helps you setup your virtual environment. If you don't have poetry, don't worry ! The [installation instructions](https://python-poetry.org/docs/#osx--linux--bashonwindows-install-instructions) are straightforward, and its use is pretty intuitive.
To initialize the project run `poetry init` and follow the instructions. The packages we want to install are :
- FastAPI: The FastAPI framework ❤️
- Uvicorn: The ASGI server that will run our app
Once you're done you should see a `pyproject.toml` file at the root of your project resembling that one:
```toml
#pyproject.toml
[tool.poetry]
name = "fastapi-poll-1"
version = "0.1.0"
description = ""
authors = ["io.io"]
[tool.poetry.dependencies]
python = "^3.8"
fastapi = "^0.70.0"
uvicorn = "^0.15.0"
[tool.poetry.dev-dependencies]
black = "^21.9b0"
reorder-python-imports = "^2.6.0"
[build-system]
requires = ["poetry-core>=1.0.0"]
build-backend = "poetry.core.masonry.api"
```
Now let's create a the Dockerfile for our app! You can create it at the root of your working directory, and add the following instructions in it:
```python
FROM python:3.9
WORKDIR /app
# Install Poetry
RUN curl -sSL https://raw.githubusercontent.com/python-poetry/poetry/master/get-poetry.py | POETRY_HOME=/opt/poetry python && \
cd /usr/local/bin && \
ln -s /opt/poetry/bin/poetry && \
poetry config virtualenvs.create false
# Copy using poetry.lock* in case it doesn't exist yet
COPY ./app/pyproject.toml ./app/poetry.lock* /app/
RUN poetry install --no-root --no-dev
COPY ./app /app
CMD ["uvicorn", "app.main:app", "--reload", "--host", "0.0.0.0", "--port", "80"]
```
This needs a bit of commenting.
The way dependencies are installed might seems a bit strange. We need to first install poetry,
then run `install` without creating a virtual env (that `--no-root` bit). What's great about this approach is that you can use
the same `pyproject.toml` in your developement environment so things like static analysis tools uses the same dependencies. In a production
settings we would probably creat a multi-stage build and discard `poetry` to have a slimer image.
The `app` folder will be created in the next section that's where our code will live.
Finally, notice the `--reload` option we pass to uvicorn which will allows us to work without having to restart the worker everytime we make
a change.
We'll launch the container a bit later, first we need to initialize the app !
### The fastapi app
First things first, let's create the folder where our code will live: `mkidr app`
Now as I said we'd only need to create a main.py file if we wanted to. But to stay true to the theme of this serie, I'd like
to create a directory structure similar to django apps. That's why we'll create a second `app` directory that will be our "main"
app. Later we'll also create a `polls` directory.
For now simply run `mkdir app/app` to create the folder, and create a `main.py` file inside of it. Your directory strucutre should now
look like this :
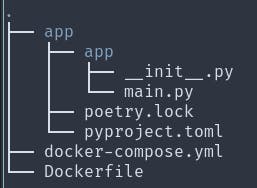
Perfect ! And now buckle up as the obligatory `hello world !` is approaching. Inside `main.py` write the following lines :
```python
from fastapi import FastAPI
app = FastAPI()
@app.get("/")
async def root():
return {"message": "Hello World"}
```
This will initialize the app and create our first [path operation](https://fastapi.tiangolo.com/tutorial/first-steps/). This one
is straight from the docs ! But you can't see the message yet as we still need to launch the container. We're almost there,
head over to the next section !
### Launching the app
Before launching the app we need to build the image first. From the root of your project run `docker build -t poll-app .`
Now we can launch the container: `docker run -it -p 80:80 -v "$(pwd)"/app:/app poll-app`. This will also mount
our app directory so we don't have to recreate it each time we edit the files.
We're now ready to test our endpoint. In your browser navigate to `localhost` and behold !
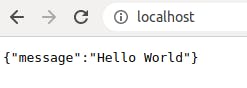

*... general kenobi*
Now that's already good, but what is *great* is that FastAPI comes with a built in and Swagger for which the open api configuration
is autogeneated. That means that if you go to `localhost/docs` you'll see the following :
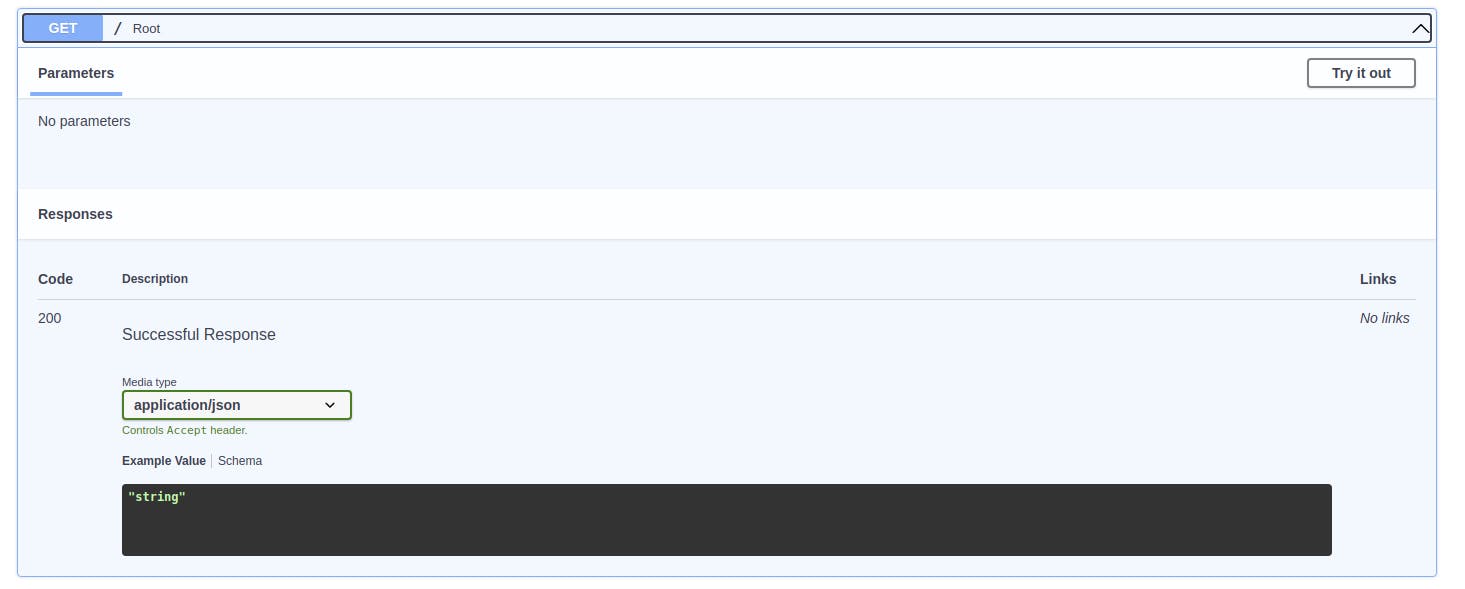
FastAPI automatically generate your endpoint documentation ! Pretty neat feature for an API to have if you ask me.
---
## 📜 Creating a poll app
Now that `Hello world !` is out of the way (I recommend adding it to your personnal collection), let's get to the actual polls app. As
I mentionned earlier we'll create a `polls` directory along side the main app. Once that's done add a file called `endpoints.py` to
this new folder, your project' structure should look like that :
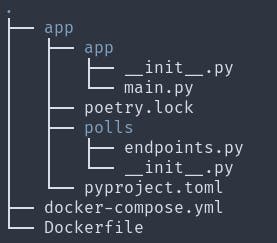
Don't forget to create the relevant `__init__.py` file so the folder are recognized as Python modules
Now let's create an index for our polls app. This index will later be responsible for listing the available polls in our database but for now it will return a simple message. Add the following code to the `polls/endpoints.py`:
```python
from fastapi import APIRouter
router = APIRouter()
@router.get("/")
async def index():
return {"message": "polls index"}
```
Here we use [APIrouter](https://fastapi.tiangolo.com/tutorial/bigger-applications/#apirouter) to declare our path operations. It works exatcly the same as
the `FastaAPI()`. Now all we need to do to make our endpoint available, is to declare it in `main.py`:
```python
import polls.endpoints
app.include_router(polls.endpoints.router, prefix="/polls")
```
The prefix indidates that all the routes coming from the polls endpoints start with polls. Your polls index should now be available both
at `localhost/polls` and in the Swagger documentation ! Let's take a look !
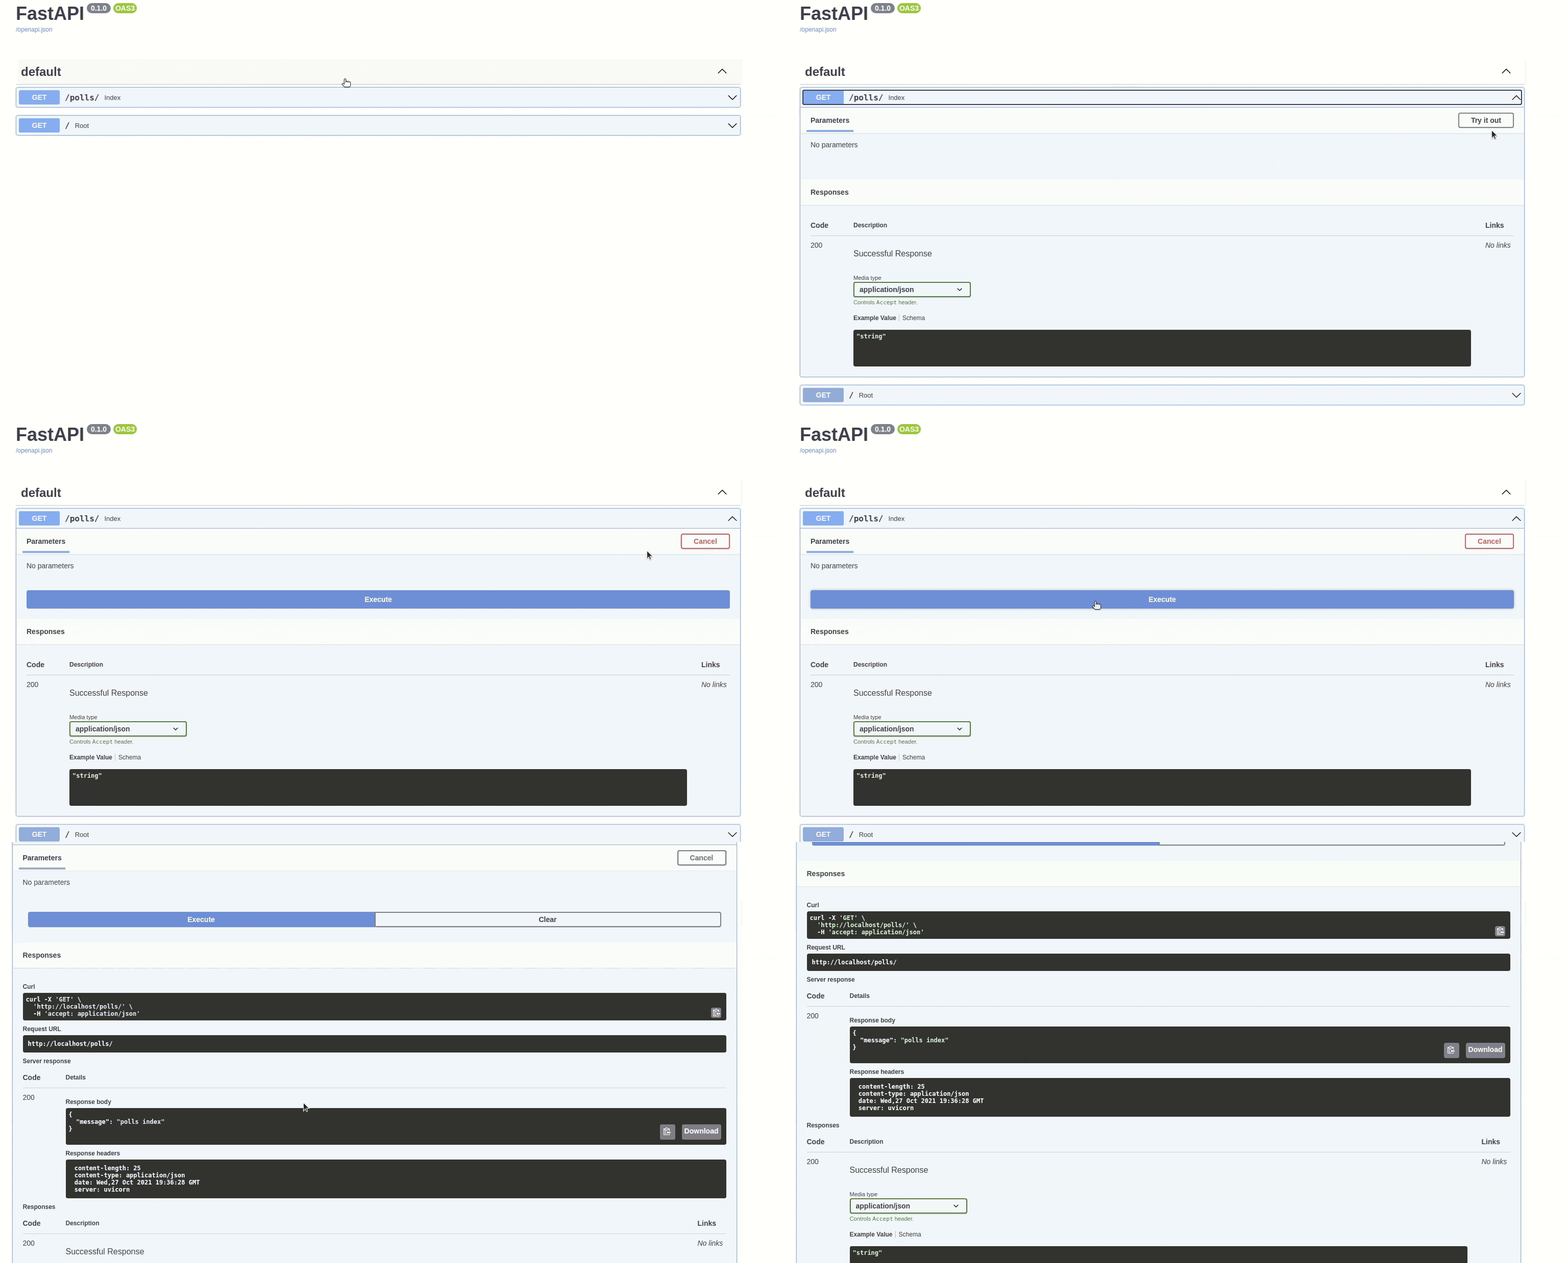
Great ! Our polls index works, although it doesn't return anything yet, we'll chnage that in part 2!
---
## Conclusion
That's is for part 1, let me know if you found it useful ! In part 2, we'll see how to set up an actual database to store our polls !